Lead contamination isn’t just another household hazard. It’s a stubborn, invisible threat that can linger long after the source has been removed. Whether you’re dealing with old paint inside a pre-war building, dust from a renovation, contaminated soil, or lead brought in on clothing from a workplace, cleaning it up requires precision, patience, and methods that actually work. Lead doesn’t behave like ordinary dirt or dust, and treating it casually can spread it further instead of eliminating it.
Today, we will be discussing how to get lead cleanup after contamination. Let’s start:
Why Lead Cleanup Requires Specialized Methods
Before jumping into the cleaning process, it’s important to understand why lead is so difficult to remove. Lead dust particles are microscopic, easy to inhale, easy to ingest, and incredibly persistent. Something as simple as a window opening and closing can release dust from deteriorating lead-based paint. Sweeping can send particles airborne. Vacuuming with the wrong filter can spread contamination room-to-room.
The danger isn’t just in obvious debris. It’s in the residue left on floors, windowsills, toys, cabinets, soil, and places that don’t immediately look dirty. Cleaning lead contamination must be methodical and repeated until testing confirms the area is safe. Anything less risks re-exposure.
This is why environmental agencies emphasize structured cleaning protocols rather than generic housekeeping. When the stakes involve brain development, cognitive health, and long-term wellness, especially for children, there’s no room for shortcuts.
Steps of Lead Decontamination in NYC
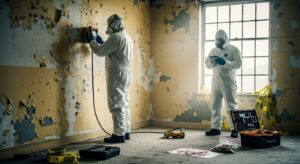
Step 1: Start With a Thorough Assessment of the Contaminated Area
Lead cleanup begins long before you touch a mop or cleaning cloth. The first step is to figure out the true extent of the contamination. This isn’t guesswork—lead spreads in ways people don’t expect.
Identify potential sources
Lead contamination most commonly comes from:
- Deteriorating paint inside older homes or buildings
- Dust from renovation or sanding
- Plumbing fixtures, solder, or pipes
- Contaminated soil in outdoor areas
- Industrial sources or workplace-related exposure
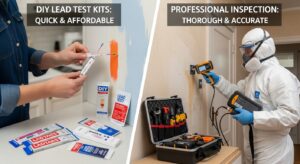
Test questionable surfaces
You can start with at-home swabs, but professional testing is far more accurate. Specialists use XRF analyzers and dust wipe sampling to map contamination patterns. If you live in an older apartment building or manage one, a formal lead inspection in NYC or a similar regulated city is often legally required.
Document the affected spaces
Lead rarely stays contained to a single spot. Make a list of:
- All painted surfaces
- Floors and carpets
- Vents and window tracks
- Furniture and children’s items
- Areas where dust naturally settles
Knowing your battlefield prevents missed spots and repeated recontamination.
Step 2: Set Up the Room to Prevent Lead From Spreading
Once cleaning begins, the biggest risk is tracking lead dust from one room to another. You need to isolate the space the same way remediation crews do.
Seal off the cleaning zone
Use:
- Plastic sheeting taped around doors
- Sealed HVAC vents
- Covered door gaps
- Signs to keep others out
If you’re cleaning multiple rooms, start with the containment area closest to the exterior door to avoid carrying dust deeper inside the home.
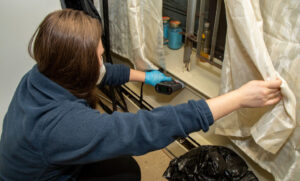
Remove items that can trap lead dust
Anything porous should be taken out or disposed of if severely contaminated:
- Curtains
- Rugs
- Stuffed toys
- Bedding
- Fabric-covered furniture
Hard, washable items can be cleaned later, but they should be moved out of the work zone before you start.
Also read: How to Remove Lead Paint Without Spreading Hazardous Dust
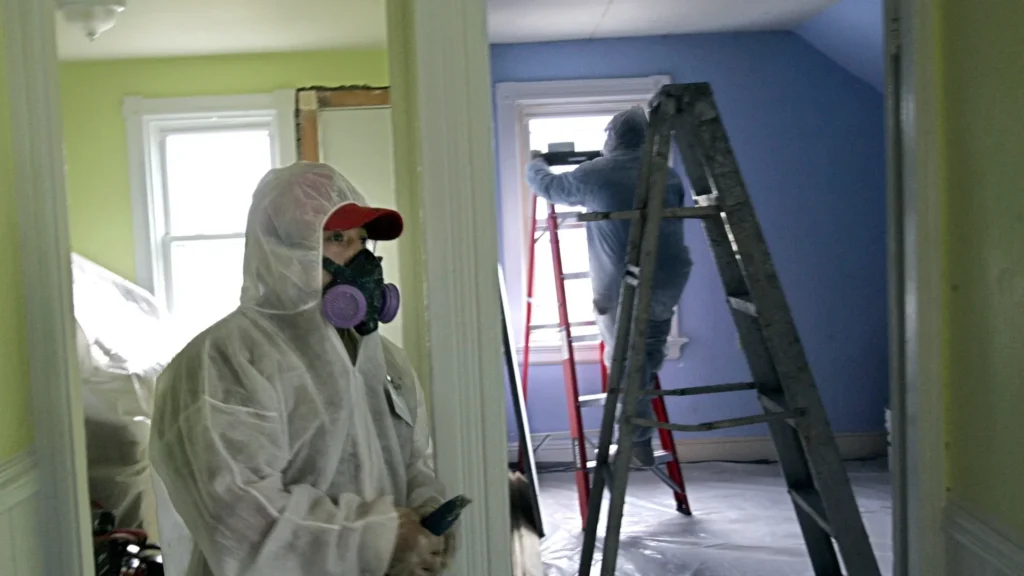
Step 3: Wear Proper Protective Gear and Prepare Safe Disposal Supplies
Lead decontamination is not something to tackle in regular household clothes. Dust will cling to fabric fibers, hair, and shoes.
Essential personal protective equipment
- NIOSH-approved respirator (not a simple dust mask)
- Disposable gloves
- Disposable shoe covers
- Protective clothing or old clothes you will wash separately
Disposal materials
- Heavy-duty trash bags
- Duct tape
- Labeled waste containers for contaminated wipes, cloths, and gear
Treat everything used in the cleaning process as potentially hazardous.
Step 4: Use Wet Cleaning Techniques, Never Dry Dusting or Sweeping
This is the most important rule in the entire process: never sweep, dry-wipe, or use a household vacuum. These methods break lead paint chips into smaller particles and blow lead dust into the air.
Start with a detergent-based wet wash
Use a cleaner designed for lead removal or a strong detergent solution. For every surface, repeat this sequence:
- Wipe with a wet cloth.
- Rinse with clean water.
- Wipe again with detergent if residue remains.
- Dry with disposable towels.
Focus on the high-risk zones
These include:
- Window wells and sills
- Baseboards
- Floors near doors
- Children’s play areas
- Radiators and vents
- Shelves and cabinets that gather dust
Work from top to bottom so any falling particles get cleaned last.
Step 5: Use a HEPA Vacuum, But Only After Wet Cleaning
A HEPA vacuum is one of the strongest tools you can use, but it must be used correctly. Ordinary vacuums blow lead particles right back into the air.
A genuine HEPA vacuum traps tiny particles and helps remove dust from floors, carpets, cracks, and window tracks. However, the vacuum should only be used after wet cleaning, not before. Wet cleaning removes paint flakes and heavy debris; HEPA vacuums polish off what remains.
If you’re dealing with rugs or carpets, several HEPA passes may be needed because fibers trap dust deep inside.
Step 6: Wash and Rinse All Floors With Lead-Safe Cleaning Solutions
Floor cleaning needs extra attention because lead settles downward and clings to grout lines, floor seams, and textured surfaces.
Use the three-bucket method:
- Bucket A: Detergent solution
- Bucket B: Rinse water
- Bucket C: Clean water for final mopping
Replace water frequently. Dirty water spreads contamination. Microfiber mops are more effective than sponge mops because they trap particles instead of moving them around.
Once the entire floor is washed, use the HEPA vacuum again once everything dries.
Step 7: Dispose of Contaminated Materials Safely and Securely
Everything from wipes to mop heads to protective clothing must be discarded properly. Double-bag waste and seal it tightly with duct tape. Label the bags if required by local regulations.
Never burn or compost contaminated debris. Keep it stored in a safe location until your municipal waste management office confirms the correct disposal method. Many regions provide designated hazardous-waste drop-off points for lead materials.
Step 8: Reclean the Area, Lead Removal Requires Multiple Passes
Unlike regular dirt, lead doesn’t come off in a single round. Effective cleaning involves repeated cycles. After your first full cleaning session, wait for the room to dry, then repeat the process:
- Wet wiping
- Wet mopping
- HEPA vacuuming
Most remediation protocols require three complete cleaning cycles before testing is done. This ensures microscopic dust that resettles is captured.
Lead contamination often hides in overlooked places such as behind appliances, inside closet corners, under window tracks, and along uneven floor joints. Each pass helps catch what the previous one missed.
Step 9: Conduct Post-Cleanup Testing to Confirm Lead Is Truly Gone
Never rely on visual inspection. You cannot see lead dust with the naked eye. The only way to confirm successful lead cleanup is through dust wipe testing analyzed by a certified laboratory and removal by lead dust remediation service.
Professional clearance testing includes:
- Dust wipes from floors, windowsills, and window troughs
- Laboratory analysis for micrograms of lead per square foot
- Comparison with EPA safety thresholds
If the results exceed allowable limits, cleaning must be repeated until clearance levels meet safety standards. Clearance testing protects residents, shields landlords from liability, and creates a documentation trail for future audits or property sales.
Step 10: Prevent Future Lead Contamination With Long-Term Safety Measures
Once the immediate hazard is under control, the focus shifts to prevention. Lead risk returns quickly if the underlying cause isn’t addressed.
Repair deteriorating paint safely
Use encapsulation or removal by trained professionals. Never dry-sand or scrape.
Maintain windows and doors
Friction surfaces create constant dust. Weatherstripping and track cleaning reduce spreading.
Monitor plumbing
Older buildings may still have solder or pipes containing lead.
Test soil in outdoor areas
Contaminated soil near foundations can track indoors on shoes and pets.
Schedule regular inspections
Especially in multi-unit buildings, older properties, or areas with construction activity nearby.
When You Should Call Professionals Instead of Cleaning Yourself
DIY methods may be enough for light surface dust, but certain situations require trained remediation specialists:
- Large areas of peeling or chipping lead paint
- Contamination across multiple rooms
- Visible lead debris after renovations
- Exposure in homes with infants or pregnant women
- Contaminated soil around the home
- Repeated high dust wipe results despite multiple cleanings
Certified contractors have respirators, industrial HEPA vacuums, chemical strippers, and negative-air machines not available to the average person. They also understand legal protocols for removal, containment, and disposal.
Attempting a major lead cleanup without the right training can unintentionally increase exposure.
Why Proper Lead Decontamination Protects More Than Just Your Home
Lead exposure impacts nearly every major organ system. In children, even low levels can cause lifelong cognitive and behavioral issues. In adults, chronic exposure can contribute to kidney problems, hypertension, and reproductive harm. Pets are vulnerable too.
Cleaning after contamination is not simply a household chore—it’s a health investment. It’s about creating a safe living environment and eliminating a risk that is easy to underestimate but devastating when ignored.
With the right strategy, consistent cleaning practices, and follow-up testing, you can restore your space and safeguard everyone who lives or works in it.
Lead Cleanup Is Challenging, But Completely Manageable With the Right Steps
Cleaning up after lead contamination requires structure, patience, and a willingness to follow proven methods. By assessing the source, isolating the area, using the correct cleaning techniques, discarding waste safely, and confirming results through testing, you can transform a risky environment into a safe one again.
We suggest that you hire professionals for lead inspection in NYC. They will assess the situation and provide proper cleanup. At Manhattan Lead, our lead inspectors will inspect the condition, provide you with a written report, and then make a proper strategy to clean up and achieve the best results. They are well-trained and experienced and guarantee the best results.
Call us now and book an appointment.